Footwear and boot fashion shots with AI: silhouette, laces, soles and floor reflections
How to frame a shoe-led AI fashion image: silhouette, laces, soles, boot creases, floor reflections, and what to re-roll when the pair is mismatched.
A shoe-led picture asks the camera to look at the lowest, smallest and most mechanical part of an outfit. There is little room to hide: the viewer sees the pair, the ground and the light on the leather in one glance, and a boot that is wrong reads as wrong immediately. The good news is that footwear is a forgiving subject once you decide a few things up front, and the same few decisions fix most failed frames.
This guide covers the shoe itself. For buckles and clasps on bags and belts, read accessory shots without warped hardware; for the material, see fabric texture close-ups. Here the subject is silhouette, laces, soles, shafts and the floor underneath.
Decide the camera before the shoe
Perspective does more damage than any detail. A low camera near floor level makes a boot look heroic and tall; a camera at eye height looking down shortens the shoe and exaggerates the toe. Say which you want, and say the angle: a side profile, a three-quarter front, or straight on. Side profile is the safest, because the outline of a shoe is its most recognisable feature and the model has a lot of practice drawing it.
- Side profile, low camera: the cleanest silhouette. Heel, arch, toe and shaft all read. Start here.
- Three-quarter front: more dimensional and more flattering, but the far shoe now overlaps the near one, and that overlap is where mismatches hide.
- Top-down: good for a flat-lay of a pair on a plain surface. Laces are easy to check, the sole is hidden.
A pair is two shoes, not one shoe twice
The commonest failure is a mismatched pair: different toe shapes, a heel that is taller on one side, a lace pattern that changes between left and right. Ask for a staggered stance, one shoe slightly ahead of the other, with the same style named once for both. Then compare them like a shopper would: toe cap, heel height, sole thickness, the number of eyelets. If they differ, it is a re-roll, not a repair.
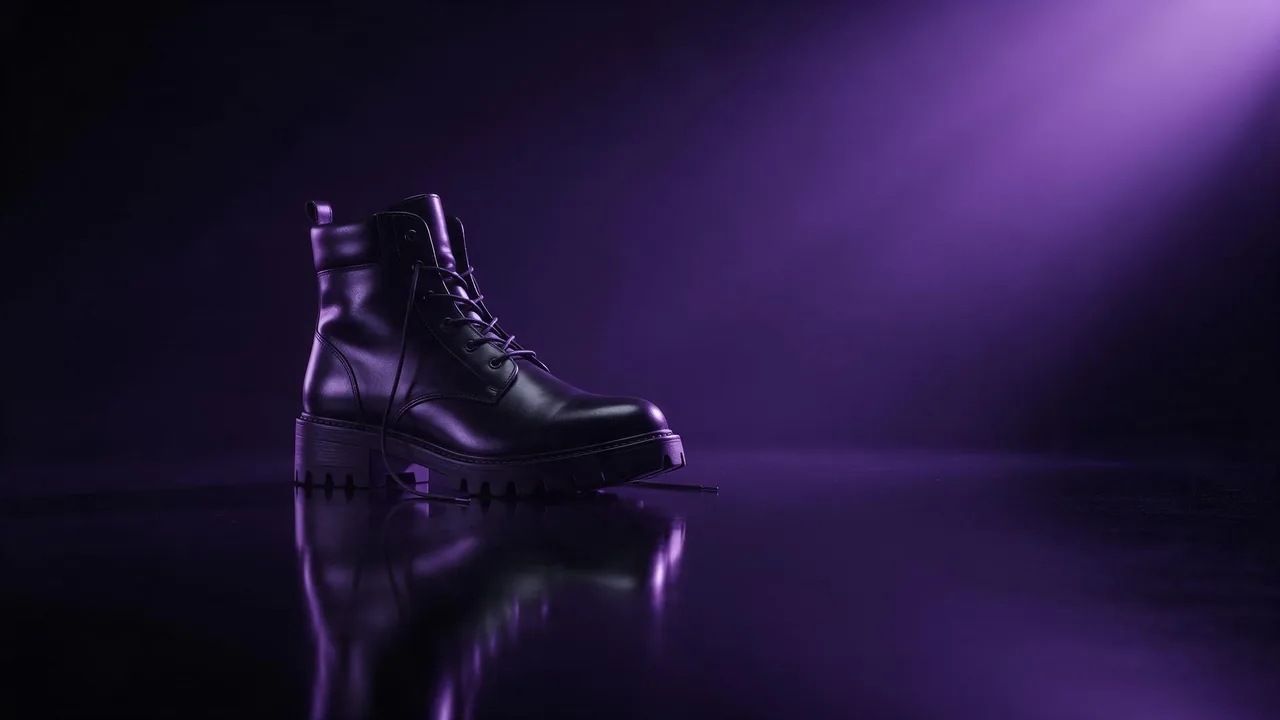
Fashion product photograph of a pair of black leather lace-up ankle boots with a chunky lug sole, side profile, staggered stance on a glossy dark floor, low camera at floor level. Same boot on both feet, matching toe cap and heel height, six pairs of eyelets, waxed round laces tied in a neat bow. One soft key light from the upper right, deep shadows, sharp focus on the lacing, 16:9.Laces and soles
Laces should enter an eyelet, cross, and end in a bow or a tuck. A lace that vanishes into the leather or loops twice is the standard tell. Round laces are easier than flat ones, and a hidden lacing (a zip or a slip-on) removes the problem altogether. Soles have their own habits: the tread pattern tends to blur into noise, so ask for a simple lug or a flat rubber sole, and check that the sole is the same thickness along the whole length of the shoe. A sole that thins towards the heel makes the boot look like it is tilting.
Boot shafts and creases
A boot shaft is a tube of leather, and tubes crease where they bend. Ask for the height by name (ankle, mid-calf, knee-high) and for the creases you expect: a few soft horizontal folds at the ankle on a worn boot, a smooth shaft on a stiff new one. Slouchy boots gather in a soft stack; structured boots hold their line. A shaft that is perfectly smooth and then suddenly rippled, or that changes width halfway, is a sign to try again. With a trouser or a skirt, say whether the hem sits over the shaft or tucks inside it, because otherwise the hem and the boot merge into one shape.
Reflections on the floor
A glossy floor is the quickest way to make a shoe look expensive, and the quickest way to add a second error. The reflection should be an upside-down copy of the lower part of the shoe, softer and darker with distance. Check that the reflected laces and sole match the real ones, and that the reflection stops where the floor ends. If you want less to check, choose a matte floor and a soft contact shadow instead. A wet street gives a broken, rippled reflection that forgives small mistakes.
How to frame a shoe-led shot with a fictional model
When someone is in the picture, a shoe-led shot is a crop: the frame starts at the knee or lower and the face is left out. That keeps the focus on the footwear and sidesteps face problems, and it works well for a lookbook. Name the stance (mid-stride, one foot forward, seated with crossed ankles), the ground (pavement, studio floor, gravel) and how much of the leg shows. Walking poses are harder than standing ones, since the feet must agree with each other and with the floor. For full-length framing and a recurring character, the street-style guide and the one-model lookbook guide cover consistency across a set.
What to re-roll, and what to edit
- Open the frame at full size and compare left and right: toe, heel, sole, eyelets.
- Trace each lace from the eyelet to its end.
- Check that both soles touch the floor, with a believable shadow.
- Read the reflection against the real shoe.
- Look at where the hem meets the shaft.
A mismatched pair or a broken shape is a re-roll. A small local flaw, such as one stray lace or a harsh glare on the toe, can be fixed with an edit model like Nano Banana 2.1 edit, and Bria Relight can soften a hot highlight on patent leather. Both can introduce a new error, so inspect the result the way you inspected the first.
Be realistic about the limits. A shoe will not be identical from one frame to the next, a tread pattern or a logo on the sole will not be legible, and a product that must match a real pair to the millimetre is outside what an image model promises. Treat these as fictional fashion visuals for mood, concepts and lookbooks, with a fictional model of legal age if anyone is in the frame. The price shows on the Generate button before you run, so try the angle cheaply and spend on the final. Compare the available models on the models page and start in the studio.
Questions
Why do my AI shoes come out as two different shoes?
The model draws each shoe separately. Name one style once, ask for a pair in a staggered stance, state details such as eyelet count and heel height, and re-roll when left and right differ.
How do I stop the laces from going nowhere?
Ask for round laces tied in a bow, or choose a slip-on or zip boot with no lacing. Then trace each lace from eyelet to end at full size before you keep the frame.
Are floor reflections worth it?
They add polish but also one more thing to check. If the reflection does not match the shoe, switch to a matte floor with a soft contact shadow.
Can I match a real product exactly?
No. Small details such as tread, logos and stitching drift between frames. Use footwear images as concepts and mood, not as a copy of an existing pair.